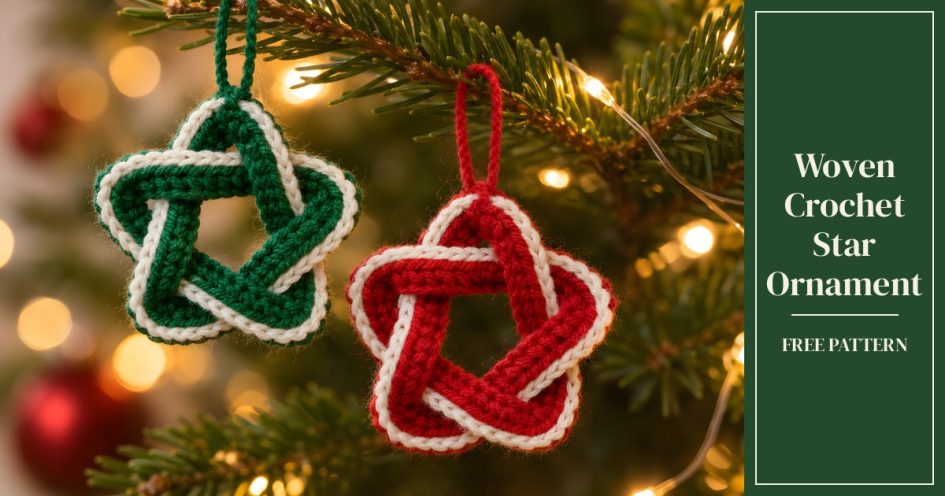
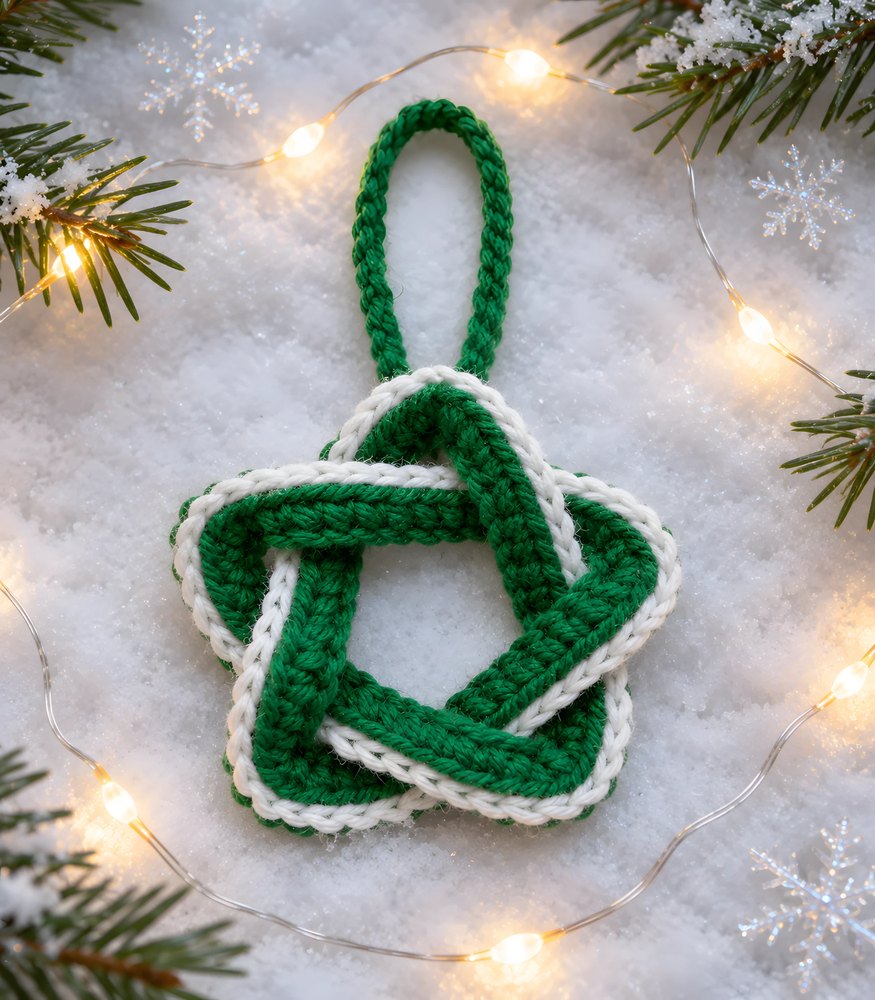
This crochet star ornament looks knotted, but it starts as one long strip. Three rows of green single crochet get a white slip stitch line along the outer edge. A few increases at five places bend the strip into rounded points, and then it weaves over and under itself like a Celtic knot. The two ends meet under one of the crossings, where the band on top hides the seam. You need no stuffing and no wire, and every stitch is a beginner stitch. The only new skill is the weaving.
- Size: about 4 1/2 in (11.5 cm) across, calculated from the gauge below
- Yarn: worsted weight (#4): about 14 yd (13 m) of green and 3 yd (3 m) of white
- Hooks: 4 mm (US G/6) for the strip, 4.5 mm (US 7) for the edging
- Skill: beginner
- Stitches: chain, single crochet, slip stitch
- Time: about an hour, going by the stitch count
How a woven crochet star works
Draw a five-pointed star without lifting the pencil, and you get five straight sides joined at five points. This star is the same line, made in yarn, with the points rounded off. The straight parts of the strip are plain single crochet. At each point, extra stitches make the outer edge longer than the inner one, and the strip curves around by itself. The starting chain always ends up on the inside of the curves and the white edge on the outside.
Each side crosses two others on the way. Celtic knot crochet works the same way: going over at one crossing and under at the next locks each side in place. A few small stitches at the back keep the star from shifting later.
What you need
- Worsted weight yarn in green, about 14 yd (13 m)
- Worsted weight yarn in white, about 3 yd (3 m)
- 4 mm (US G/6) crochet hook, plus a 4.5 mm (US 7) hook for the edging
- 1 stitch marker
- Tapestry needle and scissors
A smooth plied acrylic or cotton keeps the strip flat and the stitches crisp. Fuzzy yarn blurs the white line, and the crossings stop reading as a weave.
Gauge
Aim for 18 sc and 20 rows to a 4-inch (10 cm) square. You can check it on the strip itself: the 14 straight stitches between two curves should measure about 3 1/8 in (8 cm). Rows matter as much as stitches here, because the curves are worked out for this row height. A loose strip makes a bigger star with floppy points. If yours stretches easily, go down a hook size.
Abbreviations (US terms)
ch chain, sc single crochet, sl st slip stitch, st stitch, back bump the ridge on the back of a chain
Crochet star ornament pattern
The strip
With green and the 4 mm hook, ch 76.
| Row 1 | sc in the 2nd ch from the hook and in the next 3 ch, (3 sc in the next ch, sc in the next 14 ch) × 4, 3 sc in the next ch, sc in the last 10 ch. Turn. | [85] |
| Row 2 | ch 1, sc in the first 10 sts, ([2 sc in the next st] × 3, sc in the next 14 sts) × 4, [2 sc in the next st] × 3, sc in the last 4 sts. Turn. | [100] |
| Row 3 | ch 1, sc in the first 4 sts, ([2 sc in the next st, sc in the next 2 sts] × 2, sc in the next 14 sts) × 4, [2 sc in the next st, sc in the next 2 sts] × 2, sc in the last 10 sts. | [110] |
From Row 2 on, the strip starts to curl and overlap itself. That is the five points taking shape, and it’s fine. Fasten off after Row 3 and clip the stitch marker into the end where you started Row 1. That starting end has 4 straight stitches before its first curve, and the other end has 10.
White edging
Switch to the 4.5 mm hook. Join white with a sl st in the first sc of Row 3, at the marked end, then sl st in each st across, 110 sl st in all. Fasten off.
Keep the slip stitches loose. A tight edge pulls against the curves, and the points come out cupped instead of flat. The finished strip is about 5/8 in (1.6 cm) wide.
Hanging loop
With green and the 4 mm hook, ch 31. Sl st in the back bump of the 2nd ch from the hook and in each back bump across, 30 sl st. Fasten off, leaving both tails long enough to sew.
Weave the star
Lay the strip on a table with the side you saw while working Row 1 facing up, and the white edge on the outside of every curve. To pass under a band, lift it and push the loose end of the strip through. If you crochet left-handed, your star comes out as a mirror image, so swap left and right in the steps.
| Start | Put the marked end about halfway between the middle and the left edge of where the star will be, a little below the middle. Its 4 straight stitches run down to the lower left point, and the first curve wraps around that point. |
| Side 2 | Run up to the upper right point. There is nothing to cross yet. |
| Side 3 | Run straight across to the upper left point. There is nothing to cross yet. |
| Side 4 | Run down to the lower right point, over the marked end, then under side 2. |
| Side 5 | Run up to the top point, over side 2, then under side 3. |
| Side 1 | Run down from the top point, over side 3, then under side 4, where the strip meets the marked end. |
Every side should now go over the first band it meets and under the second. Check that before you sew, because one wrong crossing leaves a side loose. The crossings sit about 4 stitches in from each curve, with 6 stitches between them, and the opening in the middle measures about 1 1/3 in (3.4 cm) across. Off the hook, each curve bends a little more than the star needs, so a loose strip doesn’t close: its two ends land about 3/8 in (1 cm) apart. The crossings open every curve a touch, and once all five sides are woven, the ends meet under side 4. If one point looks longer than the others, slide the strip through the crossings until all five match.
Finishing
Lift side 4 and butt the two ends together underneath it, row against row. Sew them edge to edge with a green tail, then let side 4 drop back over the seam.
At each of the five crossings, take two small stitches through both bands from the back. Weave every tail in along the back of the strip.
Fold the hanging loop in half and sew both ends to the back of the top curve.
Colors and sizes
- Red and white. A red strip with a white edge looks like a candy cane bent into a star. Mix red and green crochet Christmas stars on one tree, or hang them in pairs.
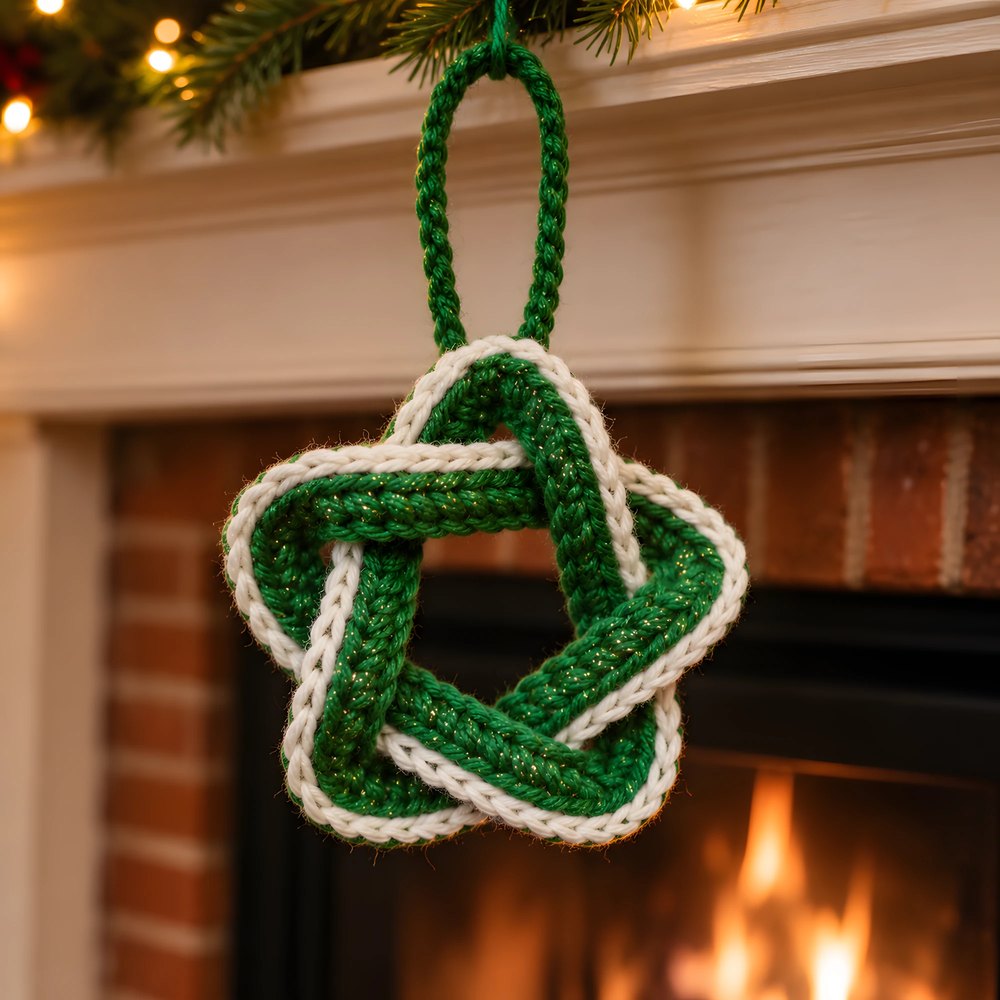
- Sparkle. Hold a strand of metallic thread together with the green for all three rows. The white edging stays plain, which keeps the outline sharp.
- Bigger star. Work the same counts in bulky yarn with a 6 mm (US J/10) hook. At 14 sc to 4 in, the star comes out about 6 in (15 cm) across.
- Smaller star. Use DK yarn and a 3.5 mm (US E/4) hook with the same counts. At 22 sc to 4 in, the star comes out about 3 3/4 in (9.5 cm) across.
If something looks off
- The points ruffle. The outer edge is longer than it needs to be. Redo the white edging with the 4 mm hook and slightly firmer stitches, which draws the edge in.
- The points cup or pull in. The white edging is too tight. Pull it out and redo it with a 5 mm (US H/8) hook.
- The star sags on the tree. The crossings need more stitches. Add one or two at the back of each, and pull them snug without bunching the bands.
Because a woven star is just a strip, it suits leftover yarn. Fourteen yards of green is less than a tenth of a typical 200-yard worsted skein, so one skein makes more than a dozen stars.