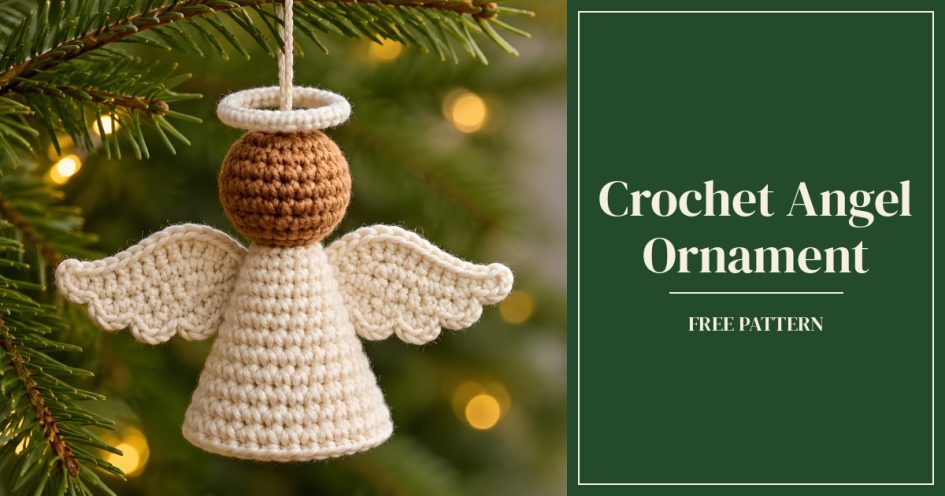
This crochet angel ornament has no face and no arms. It is a cone, a ball, two wings and a ring, and the shapes do all the work. The cone body has a flat base, so the angel can hang from a branch by its cord or stand on a shelf.
It is an easy crochet angel pattern. The body and the head are plain single crochet worked in the round. The wings are worked flat in rows of half double crochet that get longer toward the tip, and a row of fans along the lower edge turns into the scallops. The halo is a chenille stem covered with single crochet. A cream angel takes about 40 yards of yarn and a caramel head about 10 more.
- Size: about 4 1/2 in (11.5 cm) tall to the top of the head, 6 1/4 in (15.5 cm) across the wings and 2 3/4 in (7 cm) across the base, calculated from the gauge below
- Yarn: DK weight (#3) cotton: about 40 yd (37 m) of cream and 10 yd (9 m) of caramel
- Hook: 3.25 mm (US D/3)
- Skill: easy
- Stitches: chain, slip stitch, single crochet, half double crochet, double crochet, increase and decrease in the round
- Time: about 3 1/2 hours, going by the stitch count
How this crochet angel is built
The body starts at the base. Eight rounds make a flat circle of 48 stitches, and one round worked in the back loops turns the edge up into a wall. The wall stays at 48 stitches for three rounds, then narrows by three stitches at a time: every other round at first, then every round toward the shoulders, which end at 21 stitches. A last round of decreases closes it to 15, and the head sits over that opening. The head is a ball whose increases slow down toward the middle, so it comes out round instead of flat on top.
Each of the crochet angel wings starts with 12 stitches along the bottom. Every row adds one stitch at the tip end, so after 7 rows the top edge is 18 stitches long and the outer edge runs at a slant. Fans of double crochet go along that slant and along the bottom: the one at the top becomes the rounded tip, and the other four become the scallops.
What you need
- DK weight (#3) cotton yarn in cream, about 40 yd (37 m), for the body, wings and halo
- DK weight cotton yarn in caramel, about 10 yd (9 m), for the head
- 3.25 mm (US D/3) crochet hook
- Polyester fiberfill
- Thin cardboard or plastic canvas, a circle 2 1/2 in (6.5 cm) across
- 1 white chenille stem (pipe cleaner), 12 in (30 cm)
- Natural cotton cord or twine, 12 in (30 cm), for the hanging loop
- Stitch marker, tapestry needle, scissors
Cotton holds the cone shape better than acrylic and keeps the wings flat. The cardboard circle is what makes the angel stand: without it the base bulges and the cone tips over.
Gauge
Aim for 22 sc and 24 rounds to a 4-inch (10 cm) square. The fabric should be tight enough that stuffing does not show between the stitches. If it does, go down a hook size.
Abbreviations (US terms)
- ch chain
- sl st slip stitch
- sc single crochet
- hdc half double crochet
- dc double crochet
- inc 2 sc in the same stitch
- dec single crochet two together, worked through the front loops for an invisible decrease
- st stitch
- Rnd round
Crochet angel ornament pattern
Color A is cream and color B is caramel. The head and body are worked in a continuous spiral: do not join the rounds, and move the stitch marker up to the first stitch of each new round. The number in brackets is the stitch count at the end of the round or row.
Head
| Round | Instructions | Stitches |
|---|---|---|
| Rnd 1 | With B, 6 sc in a magic ring. | 6 |
| Rnd 2 | Inc in each st around. | 12 |
| Rnd 3 | (sc, inc) 6 times. | 18 |
| Rnd 4 | (5 sc, inc) 3 times. | 21 |
| Rnd 5 | (6 sc, inc) 3 times. | 24 |
| Rnd 6 | (7 sc, inc) 3 times. | 27 |
| Rnd 7 | (8 sc, inc) 3 times. | 30 |
| Rnd 8 | Sc in each st around. | 30 |
| Rnd 9 | Sc in each st around. | 30 |
| Rnd 10 | (8 sc, dec) 3 times. | 27 |
| Rnd 11 | (7 sc, dec) 3 times. | 24 |
| Rnd 12 | (6 sc, dec) 3 times. | 21 |
| Rnd 13 | (5 sc, dec) 3 times. | 18 |
| Rnd 14 | (sc, dec) 6 times. Stuff the head firmly. | 12 |
| Rnd 15 | Dec 6 times. | 6 |
Fasten off, leaving a 12 in (30 cm) tail. Thread the tail through the front loops of the last 6 stitches, pull it tight and keep the tail for sewing the head to the body. That closed point is the bottom of the head.
Body
| Round | Instructions | Stitches |
|---|---|---|
| Rnd 1 | With A, 6 sc in a magic ring. | 6 |
| Rnd 2 | Inc in each st around. | 12 |
| Rnd 3 | (sc, inc) 6 times. | 18 |
| Rnd 4 | (2 sc, inc) 6 times. | 24 |
| Rnd 5 | (3 sc, inc) 6 times. | 30 |
| Rnd 6 | (4 sc, inc) 6 times. | 36 |
| Rnd 7 | (5 sc, inc) 6 times. | 42 |
| Rnd 8 | (6 sc, inc) 6 times. | 48 |
| Rnd 9 | Working in back loops only, sc in each st around. This round makes the edge of the base. | 48 |
| Rnd 10 | Sc in each st around. | 48 |
| Rnd 11 | Sc in each st around. Drop the cardboard circle into the base. | 48 |
| Rnd 12 | (14 sc, dec) 3 times. | 45 |
| Rnd 13 | Sc in each st around. | 45 |
| Rnd 14 | (13 sc, dec) 3 times. | 42 |
| Rnd 15 | Sc in each st around. | 42 |
| Rnd 16 | (12 sc, dec) 3 times. | 39 |
| Rnd 17 | Sc in each st around. | 39 |
| Rnd 18 | (11 sc, dec) 3 times. | 36 |
| Rnd 19 | Sc in each st around. | 36 |
| Rnd 20 | (10 sc, dec) 3 times. Start stuffing, and add more as you go. | 33 |
| Rnd 21 | Sc in each st around. | 33 |
| Rnd 22 | (9 sc, dec) 3 times. | 30 |
| Rnd 23 | (8 sc, dec) 3 times. | 27 |
| Rnd 24 | (7 sc, dec) 3 times. | 24 |
| Rnd 25 | (6 sc, dec) 3 times. | 21 |
| Rnd 26 | Sc in each st around. | 21 |
| Rnd 27 | 2 sc, dec, sc, dec, sc, dec, 2 sc, dec, 2 sc, dec, sc, dec. | 15 |
Sl st in the next st and fasten off, leaving a short tail. Finish stuffing so the body is firm. The 15 stitches at the top stay open; the head covers them.
Wings (make 2)
| Row | Instructions | Stitches |
|---|---|---|
| Row 1 | With A, ch 14. Hdc in 3rd ch from hook and in each ch across. | 12 |
| Row 2 | Ch 2 (does not count as a st), turn. 2 hdc in next st, hdc in next 11 st. | 13 |
| Row 3 | Ch 2 (does not count as a st), turn. Hdc in next 12 st, 2 hdc in next st. | 14 |
| Row 4 | Ch 2 (does not count as a st), turn. 2 hdc in next st, hdc in next 13 st. | 15 |
| Row 5 | Ch 2 (does not count as a st), turn. Hdc in next 14 st, 2 hdc in next st. | 16 |
| Row 6 | Ch 2 (does not count as a st), turn. 2 hdc in next st, hdc in next 15 st. | 17 |
| Row 7 | Ch 2 (does not count as a st), turn. Hdc in next 16 st, 2 hdc in next st. | 18 |
Rows 2, 4 and 6 start at the tip end and Rows 3, 5 and 7 finish there, so the 2 hdc always go into the stitch at the tip. The opposite edge has no increases and stays straight. That is the root of the wing.
Wing edging
Do not fasten off after Row 7. Ch 1 and, without turning, work down the slanted tip edge into the ends of the rows, then along the foundation chain.
| Part | Instructions | Stitches |
|---|---|---|
| Tip and slanted edge | 5 dc in next row end, sc in each of next 2 row ends, 5 dc in next row end, sc in each of next 2 row ends, 5 dc in next row end, ending in the end of Row 1. | 19 |
| Bottom | Working in the free loops of the foundation chain, (sc in each of next 3 ch, 5 dc in next ch) 2 times, sc in each of next 4 ch. | 20 |
Fasten off, leaving a 12 in (30 cm) tail for sewing. Each wing has 5 fans: the top one at the end of Row 7 is the rounded tip and the other four are the scallops.
Halo
Cut a 7 in (18 cm) piece of the chenille stem. Bend one end into a ring 1 1/4 in (3 cm) across on the inside, wrap that end twice around the stem where the ring closes, and bend the rest of the stem down at a right angle. That 3/4 in (2 cm) tail is the post.
Join A around the ring with a sl st. Work 26 sc over the ring, pushing the stitches together so no wire shows. Sl st in the first sc and fasten off, leaving an 8 in (20 cm) tail. Leave the post bare.
Assembly
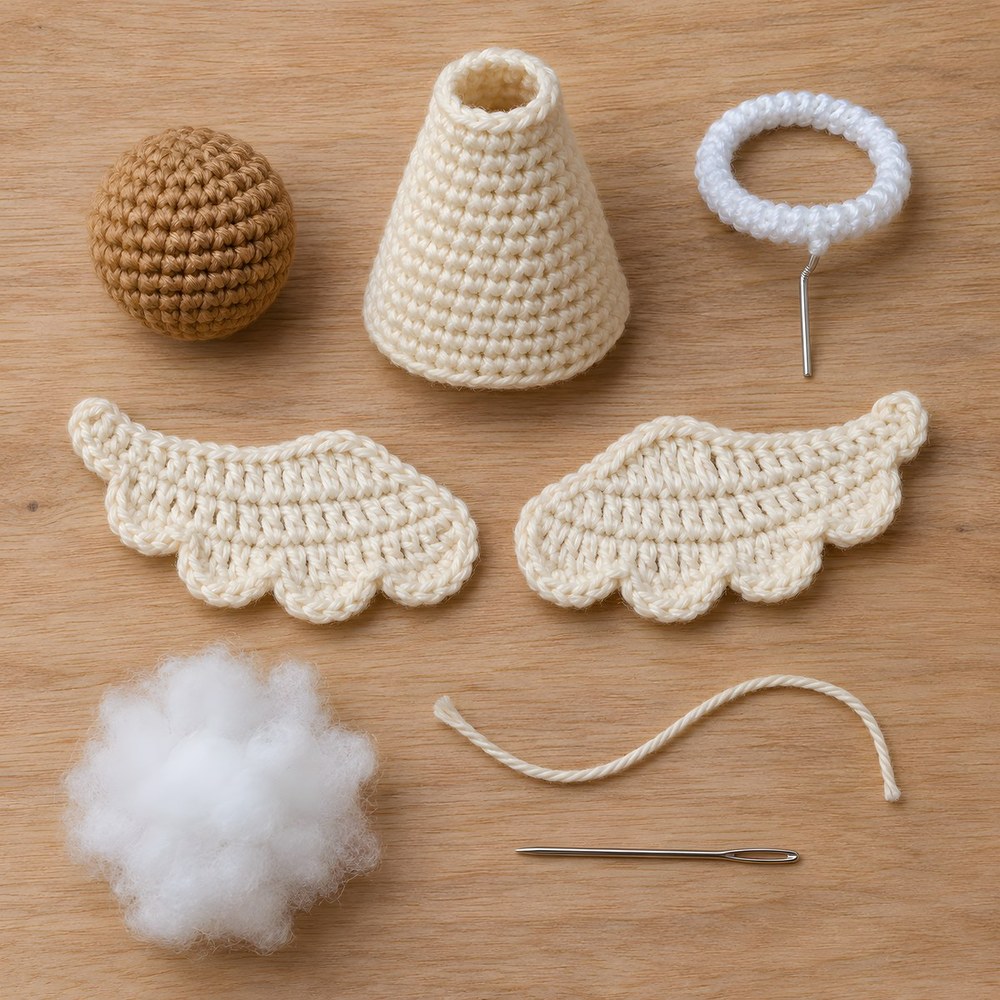
Sew the head to the top of the body with the B tail, so the closed bottom of the head covers the 15 open stitches. Stitch all the way around and push in a little more stuffing before the last few stitches if the neck feels soft.
Turn one wing over, so the two wings make a mirror pair. The body has no front until the wings go on, so pick any side for the back. Sew each wing on by its straight root edge, on a slant: the top of the root at Rnd 26 with 6 stitches between the two roots, and the bottom at Rnd 17, where the two roots meet in the middle of the back. The slant tips the wings down, so the tips sit a little lower than the shoulders. Use the A tail of each wing.
Push the post into the top of the head just behind the magic ring, so the halo stands level over the top of the head with the magic ring in its middle. The middle of the halo sits about 3/16 in (4 mm) higher than the top of the head. With the A tail, sew a few stitches around the post where it goes into the head. The post is all that holds the halo, and the front of the halo does not touch the head.
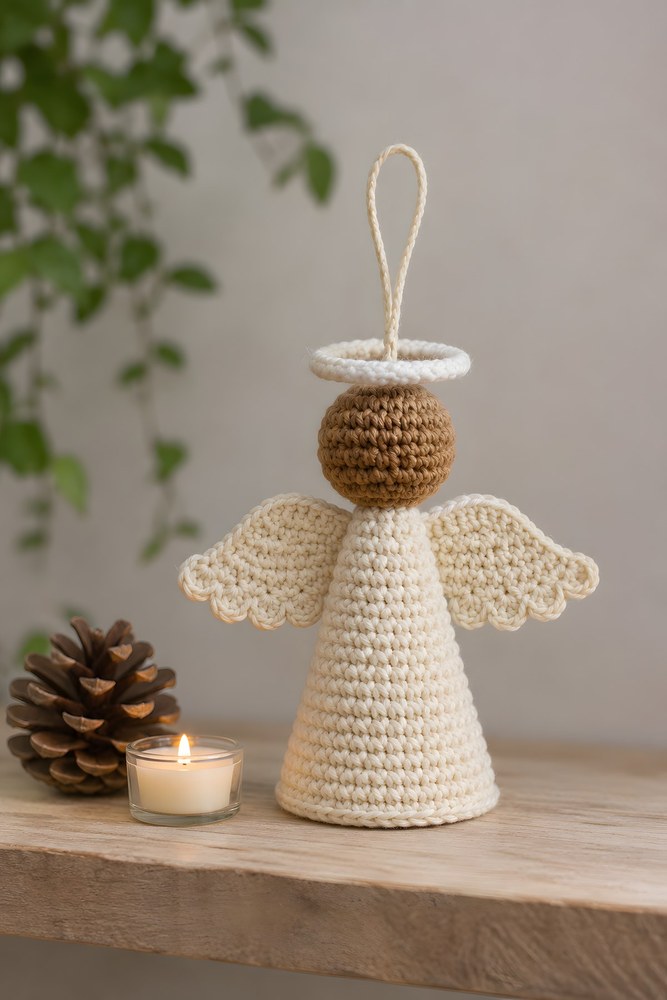
Thread the cord on the tapestry needle and pass it under two stitches next to the magic ring at the very top of the head, inside the halo. Tie the ends together 4 in (10 cm) above the head. The loop comes up through the middle of the halo.
Colors and sizes
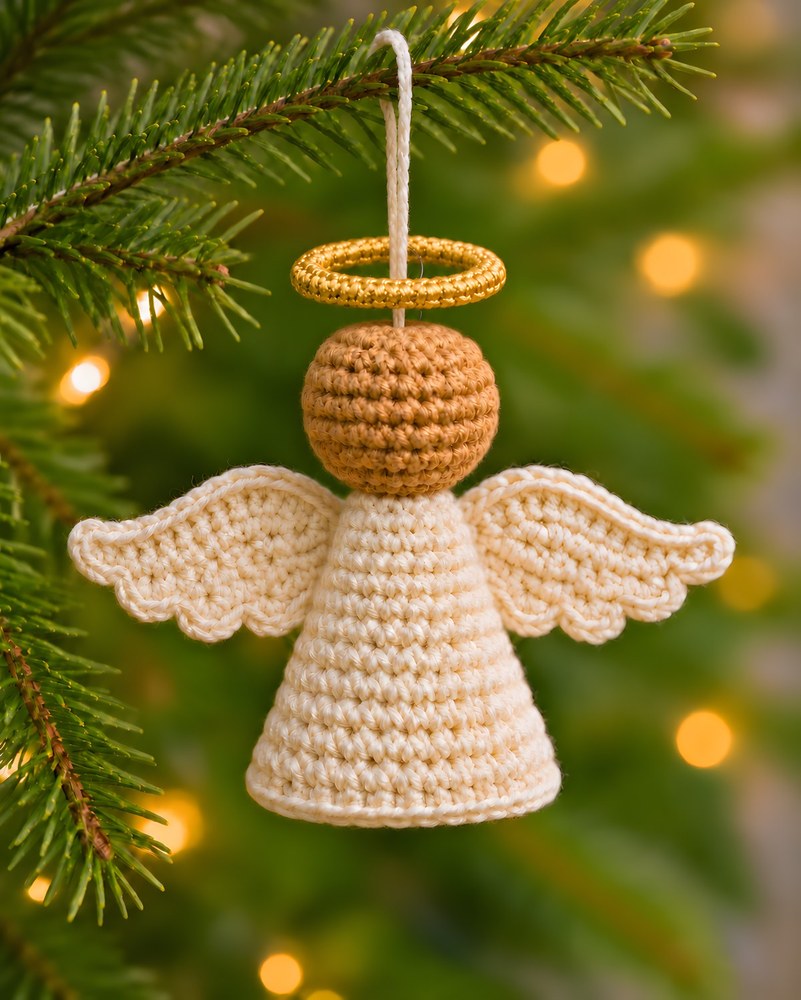
- Head color. Any warm brown, honey or peach works for the head. Keep the body, wings and halo one color so the head stands out.
- Gold halo. Work the halo in metallic gold yarn and leave the rest cream.
- Bigger. Use worsted weight cotton and a 4 mm (US G/6) hook with the same counts. At 18 sc to 4 in, the angel comes out about 5 1/2 in (14 cm) tall.
If something looks off
- The angel will not stand. The base is bulging. Push the cardboard circle flat against the bottom from the inside and take out a little stuffing near the base.
- The cone has flat sides. Stuffing rounds them out. Add more fiberfill, a little at a time, through the top opening before the head goes on.
- The wings hang down. The roots slant too much. Sew the bottoms of the two roots a stitch or two apart.
- Wire shows through the halo. Add 2 or 3 sc and push the stitches together.
Because the base is flat, the same angel works off the tree too. Skip the cord, and a row of them can stand along a mantel or a windowsill.